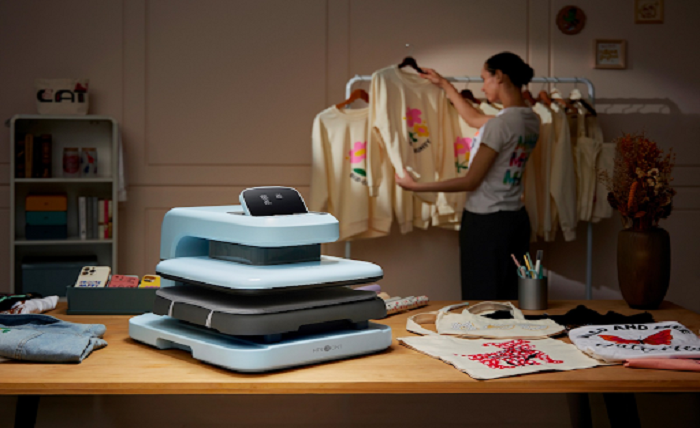
Creating custom apparel at home can be a rewarding way to turn simple T-shirts, sweatshirts, tote bags, and other garments into personalized designs. A well-planned heat transfer project does not require complicated techniques, but it does require an understanding of how the equipment, vinyl, garment, and design work together. When each part of the process is handled correctly, you can create clean and consistent results for personal projects, gifts, events, or small apparel businesses.
A heat press is at the center of many heat transfer projects because it applies controlled heat and pressure to help bond a design to fabric. HTV vinyl provides the material that carries the design, while a cutting machine prepares the vinyl according to the artwork. The complete process involves several steps, including selecting suitable materials, preparing the design, cutting and weeding the vinyl, positioning it on the garment, and applying the appropriate pressing conditions.
For people starting with apparel customization, the wide range of equipment and materials can sometimes feel confusing. The HTVRONT product ecosystem brings together equipment and materials used for different stages of heat transfer projects. Understanding what each component does can help you build a workflow that suits your projects and reduces unnecessary material waste.
Choosing the Right Heat Press for Your Projects
A heat press is an important piece of equipment for anyone who plans to create custom garments regularly. Unlike an ordinary household iron, a dedicated press is designed to provide a controlled pressing surface and consistent application conditions. When choosing a Heat Press, it is useful to consider the types of garments and designs you expect to make most often.
The size of the pressing area is one practical consideration. Smaller projects may not require a large working surface, while larger shirt graphics can benefit from having enough room to position the design comfortably. The way the press opens, closes, and applies pressure can also affect how easy it is to use during repeated projects.
Another important consideration is the type of work you plan to complete. Someone making occasional personalized shirts may have different requirements from a creator producing multiple garments in one session. Before selecting equipment, think about the size of your designs, the materials you plan to use, the garments you will customize, and the amount of workspace available.
It is also important to become familiar with the manufacturer’s operating instructions. Heat transfer results depend on more than heat alone. Temperature, pressure, and pressing time all need to be appropriate for the material and garment being used. Following the recommended application instructions for each material provides a better starting point than using the same settings for every project.
Selecting the Right HTV Vinyl for Apparel
HTV vinyl, or heat transfer vinyl, is a material designed to be cut into shapes, lettering, and graphics before being transferred onto fabric. Different vinyl types can have different appearances and application requirements, so the right material should be selected according to the garment, design, and desired finish.
When choosing htv vinyl, start by considering the type of project you are creating. A simple text design may work well with a standard vinyl finish, while decorative apparel may call for a different appearance. The color of the garment is another consideration because the contrast between the vinyl and fabric can significantly affect how visible the design looks.
Material compatibility should also be checked before starting a project. Not every type of vinyl is intended for every fabric, and different materials can require different temperature, pressure, and pressing time. Always check the application instructions for the specific vinyl you have selected rather than assuming that one setting works for all materials.
Handling the vinyl correctly is equally important. Keep it clean, flat, and protected from unnecessary dust or moisture before use. If the material becomes damaged or contaminated, cutting and weeding can become more difficult. Good material storage is a simple part of maintaining a reliable heat transfer workflow.
Preparing and Cutting Your Design Correctly
A professional-looking garment begins with a well-prepared digital design. Before sending artwork to a cutting machine, check the dimensions, spacing, lettering, and overall composition. Think about how the design will look on the actual garment rather than judging it only on a computer screen.
For HTV projects, the design often needs to be mirrored before cutting. This is particularly important when working with text because the vinyl is normally positioned with its carrier side facing appropriately during application. If a design is not prepared correctly before cutting, the final result can appear backward. Taking a moment to check the mirrored preview can prevent unnecessary material waste.
The cutting settings should match the vinyl being used. Blade depth, cutting pressure, and speed can influence the quality of the cut. A cut that is too shallow may make weeding difficult, while an overly aggressive setting can cut through material that should remain intact. Testing a small section before cutting a complicated design can help you identify the appropriate settings.
Detailed designs require additional attention. Very thin lines, tiny lettering, and small isolated elements can be harder to weed and transfer. For beginners, starting with clean shapes and moderately sized lettering can make the learning process easier. As you become more comfortable with the workflow, you can gradually experiment with more detailed artwork.
Weeding and Preparing Vinyl for Pressing
After the cutting stage, the excess vinyl around the design needs to be removed. This process is commonly called weeding. The goal is to leave only the parts of the vinyl that should appear on the finished garment.
Weeding is easier when the cutting settings are appropriate. If the cut is clean, unwanted sections can usually be separated more easily from the design. Start carefully around small details and avoid pulling aggressively because delicate elements can sometimes lift unintentionally.
A weeding tool can help remove small pieces of unwanted material, especially around letters and detailed graphics. Good lighting also makes it easier to see cut lines and identify which sections should remain. Taking your time during this stage can have a noticeable effect on the final appearance of the shirt.
Once the design has been weeded, inspect it before moving to the heat press. Check that every required letter and graphic element is present and that no unwanted vinyl remains attached. This is also a good time to confirm the orientation of the design and make sure it is ready for placement on the garment.
Applying HTV Vinyl With a Heat Press
Before pressing, prepare the garment by placing it on a clean and suitable surface. Smooth out wrinkles and position the shirt carefully so that the design will sit where you want it. If the project requires a centered graphic, take time to measure the placement rather than relying entirely on visual judgment.
Place the prepared vinyl according to the application instructions for the material. The correct orientation and position are important because once the pressing process begins, moving the design may not be possible without affecting the result. For repeated shirts, using a consistent placement method can help every garment look similar.
Temperature, pressure, and pressing time are three important parts of the application process. The correct combination depends on the vinyl and fabric being used. A higher temperature is not automatically better, and pressing for longer does not necessarily produce a better result. Always use the application recommendations provided for your specific material.
After pressing, follow the vinyl manufacturer’s instructions for carrier removal and cooling. Different materials may require different handling methods, so avoid treating every HTV project identically. Allowing the design to finish properly before stretching, folding, or washing the garment can help maintain the intended appearance.
Improving Quality and Avoiding Common Heat Transfer Mistakes
Many heat transfer problems can be prevented before the heat press is even turned on. One common mistake is choosing a vinyl without checking whether it is suitable for the fabric. Another is using incorrect pressing conditions because a setting from a previous project was reused without checking the requirements of the new material.
Design placement is another area where small mistakes can become obvious. A graphic that is slightly too high, too low, or off-center may make an otherwise well-made shirt look unfinished. Measuring the placement before pressing is particularly helpful when producing multiple garments with the same design.
Poor cutting and weeding can also affect the finished appearance. If unwanted vinyl remains around the design, it may become visible after pressing. If parts of the design are accidentally removed during weeding, the final graphic will not match the original artwork. Careful inspection before pressing can catch many of these problems.
Equipment maintenance should not be overlooked either. Keeping the pressing area clean and following the equipment manufacturer’s maintenance instructions can help keep your workspace ready for future projects. Your cutting machine should also be kept in suitable condition, with attention to the blade and cutting surface when necessary.
Once a project is complete, garment care becomes important. Follow the care instructions associated with the particular vinyl and garment. Washing conditions, detergents, drying methods, and ironing practices can all affect customized apparel over time. Treating finished garments according to the material’s care guidance can help preserve the design.
For people making multiple shirts, consistency is especially valuable. Keep notes about the vinyl type, fabric, design size, placement, and application settings used for successful projects. This creates a simple reference for future work and can make repeated orders easier to manage.
Conclusion
A successful heat transfer project depends on the relationship between the heat press, HTV vinyl, cutting equipment, design, and garment. Each part has a specific role, and paying attention to the complete workflow can make the process easier for both beginners and experienced creators.
Start by choosing equipment that fits your project requirements, then select vinyl that is appropriate for the garment and desired finish. Prepare the artwork carefully, mirror it when required, and use suitable cutting settings. After cutting, take your time with weeding and inspect the design before positioning it on the shirt.
When it is time to press the design, follow the material-specific instructions for temperature, pressure, and pressing time. Avoid assuming that one set of conditions will work for every vinyl or fabric. Careful preparation and consistent application are more valuable than simply increasing heat or pressing time.
With the right approach, custom apparel can become a practical and enjoyable creative process. Whether you are making a single personalized T-shirt, preparing gifts, creating clothing for an event, or developing a small apparel business, understanding each stage of heat transfer can help you achieve cleaner designs and more consistent results.