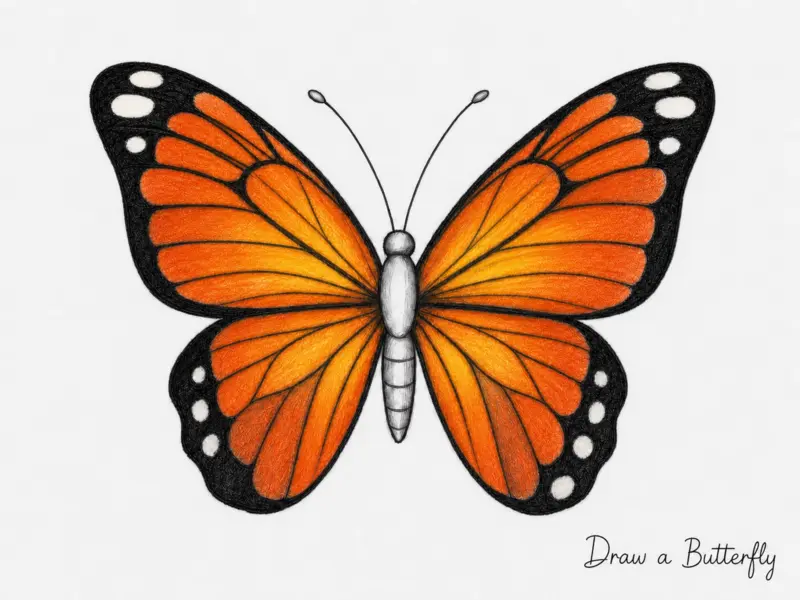
How to Draw a Butterfly Step by Step
Butterflies look intimidating at first glance. The curved wing edges, the intricate patterns, the delicate symmetry — it all seems like something only experienced artists can pull off. But the reality is that a butterfly is one of the most beginner-friendly subjects once you understand the right approach.
The key is breaking it down. Instead of trying to draw a butterfly all at once, you build it piece by piece — body first, then wing shapes, then veins, then patterns, then color. Each stage is simple on its own. Combined, they produce something that genuinely looks impressive.
Understand Butterfly Anatomy Before You Draw
Most butterfly drawings go wrong for one reason: the wings end up uneven. Understanding basic anatomy before picking up a pencil fixes that problem before it starts.
A butterfly’s body has three main sections. The head is small and round, holding the eyes and antennae. The thorax is the center section — slightly larger than the head — where the wings and legs attach. The abdomen is the long, narrow section that extends downward below the wings. Together, these three parts form a gentle vertical line that becomes the axis of your entire drawing.
The wings come in two pairs. The upper wings are larger and more triangular. The lower wings are smaller, softer, and more rounded. Both pairs attach at the thorax, and — most importantly — a butterfly is almost perfectly symmetrical. The left side mirrors the right side. This symmetry is what makes butterfly drawings look either balanced and natural or immediately wrong.
Practice Symmetry First
Before drawing your butterfly, spend a few minutes on symmetry practice. Draw a light vertical line down the center of your page. This is your body axis. Draw one wing shape on the left side only — focus entirely on getting the curves right. Then mirror those same curves onto the right side, constantly comparing both sides as you work.
If you’re drawing on paper, here’s a useful trick: lightly fold the page along the center line and hold it up to the light. You’ll instantly see whether both wings align. This fold-test is quick, simple, and far more accurate than eyeballing from a distance.
What You Need to Draw a Butterfly
You don’t need expensive supplies. For a pencil sketch, an HB pencil for light construction lines and a 2B or 4B for darker final lines is all you really need. A kneaded eraser is ideal — it lifts graphite cleanly without roughing up the paper surface.
For coloring, colored pencils work beautifully for butterfly drawings because they layer well and allow gradual buildup of color. If you’re working digitally, the same principles in this guide apply — just use layers to separate your construction sketch from your final linework and coloring.
Step-by-Step: How to Draw a Butterfly
Work through these stages in order. Keep your pencil pressure light during the first four steps — dark early lines make corrections much harder.
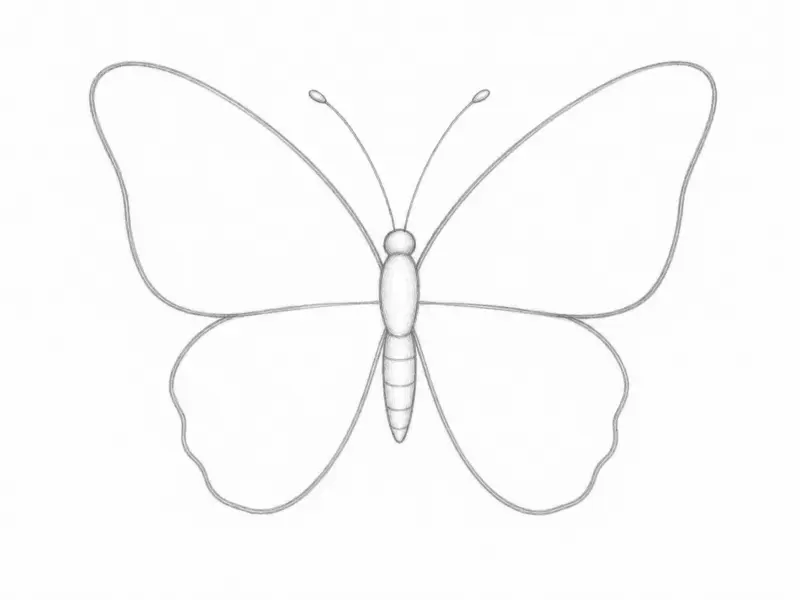
Step 1: Draw the Body
Start at the center of your page and work vertically. Draw a small circle for the head. Directly below it, add a slightly larger oval for the thorax. Below that, draw a long, narrow oval for the abdomen — this section should be noticeably slimmer than the thorax.
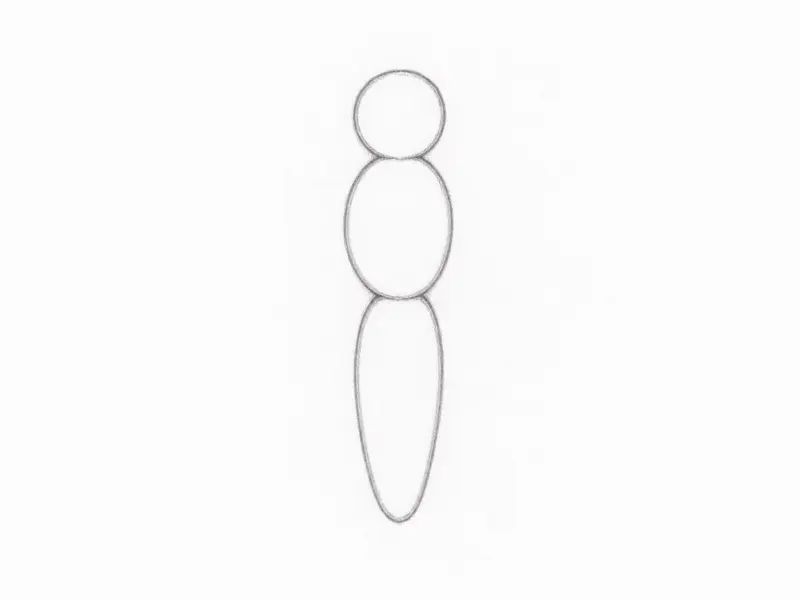
Connect all three shapes with smooth, gentle lines so the body reads as one continuous form rather than three separate shapes. The entire body should stay narrow. A common mistake here is making the thorax too wide, which throws off the wing proportions later.
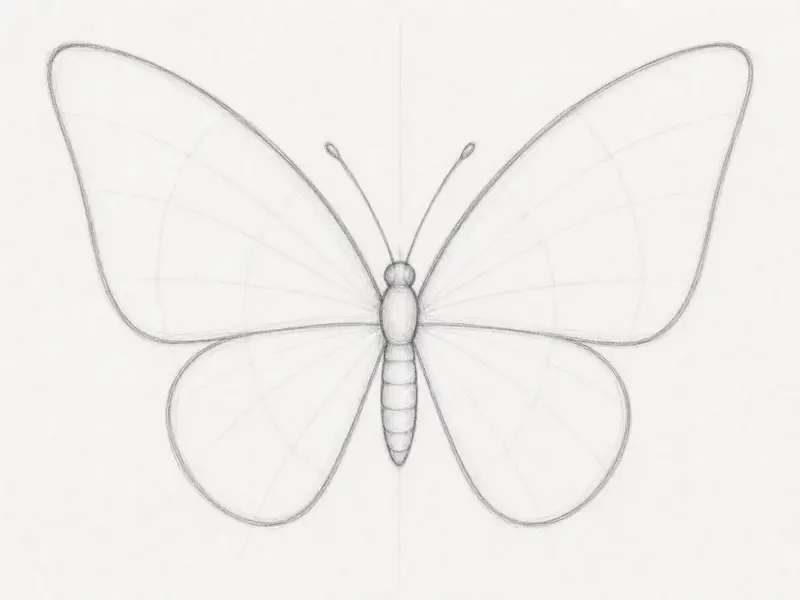
Step 2: Draw the Upper Wings
The upper wings define the butterfly’s overall silhouette, so take your time here. Starting from the upper thorax, sweep a curved line outward — imagine you’re drawing a stretched triangle with soft, rounded corners instead of sharp ones. Bring the outer edge downward gently, then curve it back toward the lower thorax.
The highest point of the upper wing sits roughly level with the top of the thorax. The widest point extends outward at about the mid-wing area. Avoid making the wings too pointed or too rounded — real butterfly upper wings have a slight angular quality that gives them their distinctive shape.
Draw the left wing first, then mirror it carefully on the right side.
Step 3: Draw the Lower Wings
The lower wings begin just below the upper wings and should look softer and rounder overall. Starting from the lower thorax, curve the line outward — not as far as the upper wing — and create a gently rounded bottom edge before bringing it back to connect with the body.
Keep these wings visibly smaller than the upper pair. A common mistake is making the lower wings too large, which makes the butterfly look heavy and unnatural. The lower wings should feel like a supporting shape, not a competing one.
Step 4: Sketch the Antennae
From the top of the head, draw two thin, gently curved lines extending upward and slightly outward. At the tip of each antenna, add a small rounded club shape. Real butterfly antennae are delicate — keep your lines light and thin. Thick antennae immediately make a butterfly drawing look cartoonish unless that’s the style you’re going for.
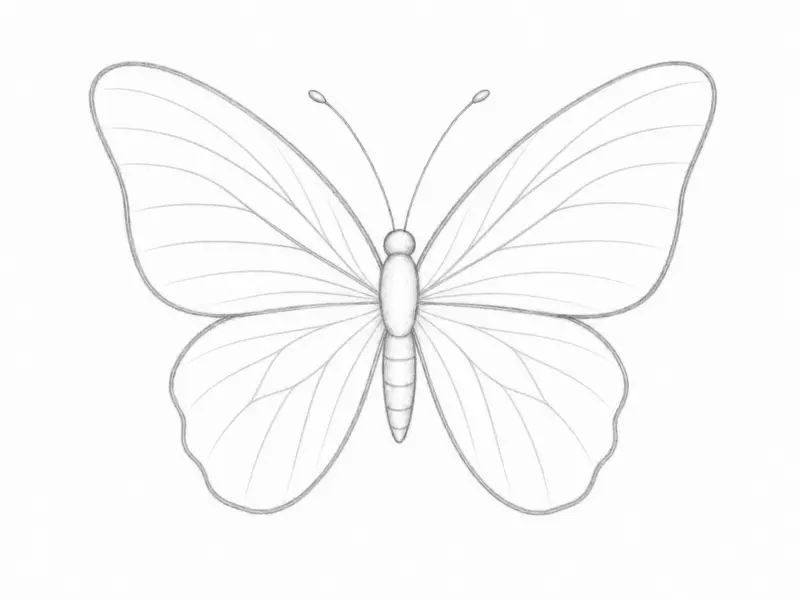
Step 5: Clean the Outline
Erase your construction lines and any rough sketch marks. Once the page is clean, go over your final outline with slightly more pressure — or switch to a 2B pencil or fine-liner pen if you want a crisp, confident edge. At this stage, your butterfly should look balanced and symmetrical. If something looks off, now is the time to correct it before adding any pattern work.
How to Draw Realistic Butterfly Wing Patterns
This is where many beginners go wrong — they add random dots and lines without understanding how butterfly patterns actually work. Real butterfly wing patterns are not random. They follow the structure of the wing, flowing outward from the body along the veins.
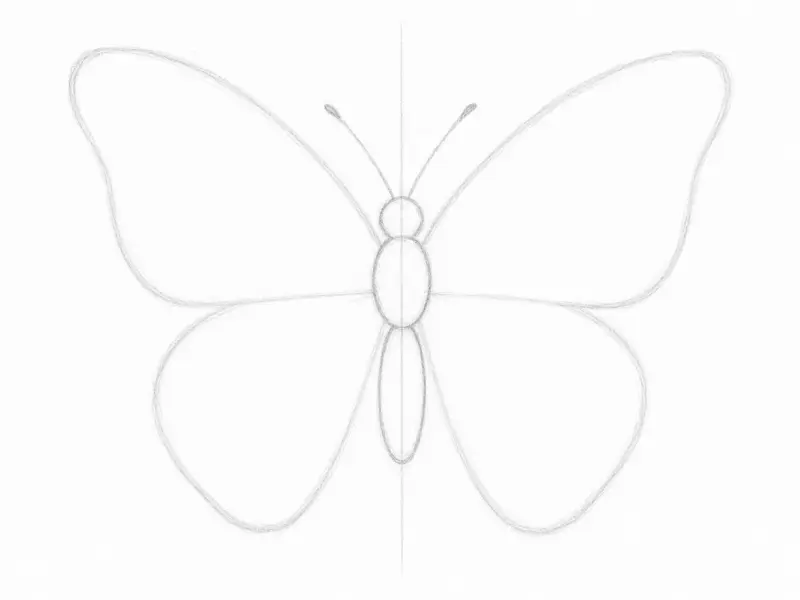
Step 1: Draw the Wing Veins
Wing veins are the framework that all patterns build on. Starting from the body, draw thin lines radiating outward toward the wing edges, following the natural curve of the wing shape. The veins closest to the body are slightly thicker; they taper as they reach the outer edge. Make them slightly irregular — perfectly even veins look mechanical, while slight natural variation looks authentic.
Step 2: Add Large Pattern Areas First
Resist the urge to start with tiny dots and details. Instead, block in the major pattern areas first: the thick outer wing border, large central sections, and any significant spots. Work in large shapes before small ones. This creates visual balance and ensures the overall pattern reads correctly even before the fine details go in.
Step 3: Layer Smaller Details
Once the large pattern areas are in place, layer in the smaller elements: tiny spots along the border, thin edge markings, teardrop shapes, and curved dark sections. Work slowly and deliberately. Butterfly patterns require patience — rushing this stage is the most common reason butterfly drawings end up looking cluttered rather than intricate.
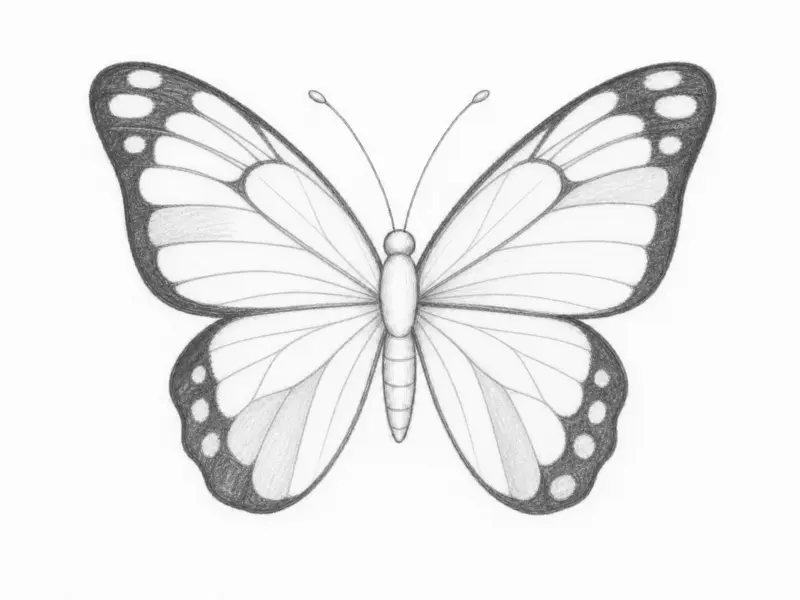
Step 4: Use Negative Space for White Spots
This technique makes a noticeable difference in final quality. Instead of trying to draw white spots directly — which is difficult with pencil — shade around them. Lightly mark the white area, then carefully shade the surrounding sections, leaving the center untouched. The white paper does the work. This approach produces much cleaner, more natural-looking highlights than trying to add white on top of already-shaded areas.
How to Shade and Color a Butterfly
Flat coloring is the single biggest reason butterfly drawings look fake. Real wings have subtle color variation — lighter in some areas and deeper in others. Layering is what creates that natural depth.
Step 1: Apply a Light Base Color First
Never start with dark, heavy pressure. Apply a light, smooth base layer first — typically orange, yellow, or whatever the dominant wing color is for your chosen species. Use small circular or directional strokes and keep coverage even. This base layer is what all subsequent colors will blend into.
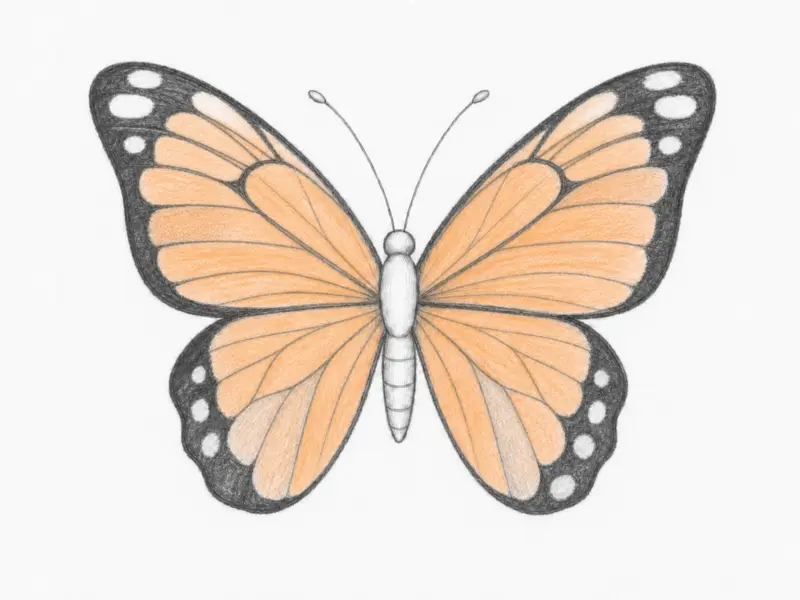
Step 2: Build Color Gradually
Once the base is down, begin deepening specific areas. Darken the color near the wing veins, where natural shadow accumulates. Add stronger color saturation toward the wing edges. Keep the central wing areas slightly lighter to suggest that light is striking the upper surface of the wing directly.
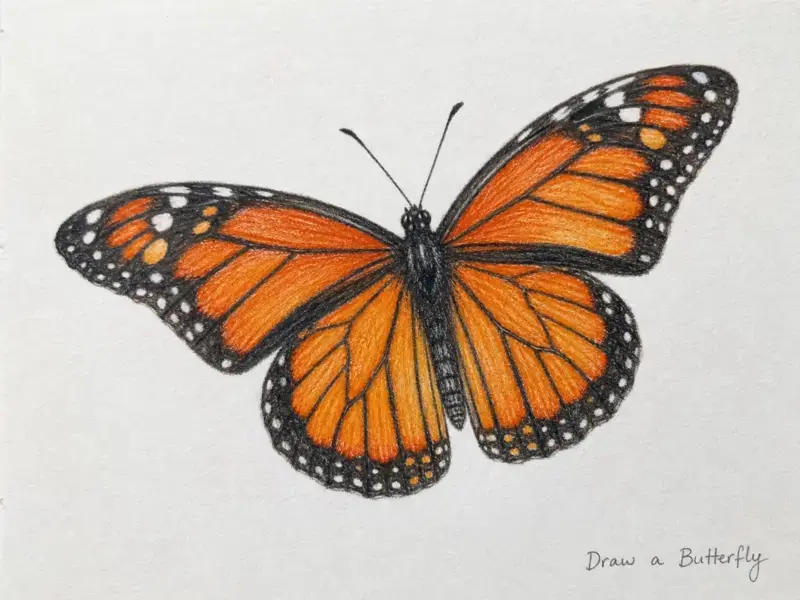
Step 3: Layer Warm Colors for Depth
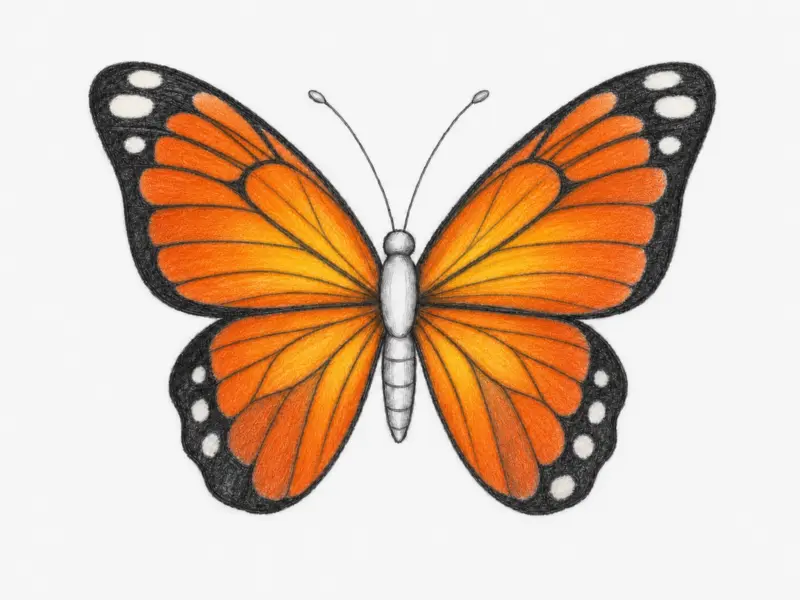
Monarch butterflies combine orange, yellow, and red-orange in their wings. The layering sequence matters: lay orange first, add yellow lightly in the lighter zones, then return with orange to blend the transition. Done slowly, this creates a warm, luminous quality that single-layer coloring simply cannot achieve.
Step 4: Add Dark Contrast Last
The darkest values — wing borders, vein lines, body sections, and edge patterns — go in last. Adding dark contrast at the end gives you full control over how intense it looks against the colors underneath. Sharp, confident dark lines in these areas are what make a butterfly drawing look finished and realistic.
Step 5: Blend Pencil Strokes
If visible pencil lines are disrupting the smoothness of your coloring, blend them with repeated light circular strokes rather than increasing pressure. Heavy pressure at this stage damages the paper’s texture and causes wax buildup that prevents further layering. Subtle, gradual blending keeps your colors clean and workable.
Common Butterfly Drawing Mistakes and How to Fix Them
Uneven wings — Almost always caused by jumping into details before the large shapes are confirmed. Establish the full wing outline on both sides before adding a single vein or pattern mark.
Veins that are too thick — Real butterfly veins are delicate. Use a sharper pencil tip and apply very light pressure. If using pen, choose the finest line weight available.
Flat, lifeless coloring — A single color layer with uniform pressure produces flat results. Layer multiple shades, vary your pressure, and always work from light to dark.
Overworked paper — Signs include smudging, rough paper texture, and waxy patches that won’t accept more color. Prevention is simple: build layers slowly with light pressure. Once paper is overworked, it’s very difficult to recover.
Random, unstructured patterns — Butterfly wing patterns follow the vein structure and flow outward from the body. Study a reference photo of your chosen species before adding any pattern. Even a quick look at the real thing will make your pattern placement dramatically more accurate.
The Mirror Mapping Method for Perfect Symmetry
Most tutorials teach you to either trace or copy a whole wing at once. Neither approach handles symmetry as reliably as mirror mapping — a technique professional illustrators use but rarely explain in beginner guides.
The idea is simple: instead of trying to mirror an entire complex wing shape in one go, you divide the wing into smaller zones and mirror one zone at a time.
How to apply it: Mentally divide each wing into four sections — the top corner area, the outer edge, the middle pattern zone, and the lower curve. Complete one small zone on the left side, then immediately mirror that same zone on the right before moving on. As you work, compare the distance from the body to key landmarks — a spot, a vein intersection, a curve — on both sides constantly.
The reason this works is straightforward: the brain finds it much easier to judge whether two small, simple shapes match than to evaluate whether two large, complex shapes are true mirror images. Breaking the task into smaller comparisons makes accuracy far more achievable, and it’s why professional illustrators rely on this approach even when they’ve been drawing for years.
Advanced Tips for More Realistic Results
Add wing texture. Real butterfly wings are covered in tiny overlapping scales. You can suggest this texture with very small, soft directional strokes following the natural flow of the wing. Keep it subtle — heavy texture overwhelms the pattern detail underneath.
Always use reference photos. Memory and imagination produce generic butterflies. Reference photos reveal species-specific details: how the veins actually branch, how border patterns repeat, how color transitions from wing center to outer edge. Even a few minutes studying a reference will visibly improve your drawing.
Practice different species. Each butterfly species teaches something different. The Monarch is ideal for beginners — bold, high-contrast patterns that are easy to read and reproduce. The Swallowtail introduces tail extensions and more complex wing edges. The Blue Morpho challenges you with vibrant, iridescent color blending. The Painted Lady offers intricate multi-element patterns that develop patience and fine detail control.
FAQ
How do you draw a butterfly for beginners? Start with the body — three simple shapes stacked vertically. Add the large wing outlines next, making sure both sides match before drawing any detail. Veins and patterns always come last.
What is the easiest butterfly to draw? The Monarch butterfly. Its wing patterns are bold and clearly defined, making them easy to observe and reproduce without requiring fine detail work.
How do you make butterfly wings symmetrical? Draw a vertical center guideline first, then use the mirror mapping method — complete one small wing zone at a time and mirror it on the opposite side before moving to the next section.
Should I sketch lightly at first? Yes, always. Light construction lines are easy to erase and adjust. Dark early lines commit you to shapes before you’ve confirmed they’re correct, which creates problems that are hard to fix later.
What colors work best for butterfly drawings? It depends on the species. Orange, yellow, and black for Monarchs. Deep blue and black for Morphos. Warm browns, orange, and white for Painted Ladies. Reference photos will give you the exact color relationships for whichever species you choose.
Final Thoughts
Drawing a butterfly well comes down to three things: understanding the structure, respecting symmetry, and building detail gradually rather than all at once. Skip straight to patterns before the wing shapes are right, and the drawing won’t work no matter how carefully you render the details. Get the structure right first, and everything else follows naturally.
Start with light pencil marks. Build the body and wing outlines. Confirm symmetry before adding anything else. Add veins before patterns. Color in layers from light to dark. Each stage is manageable on its own — and the result, when you work through them in order, is a butterfly drawing that genuinely does justice to the subject.