How to Draw a Rose Step by Step for Beginners
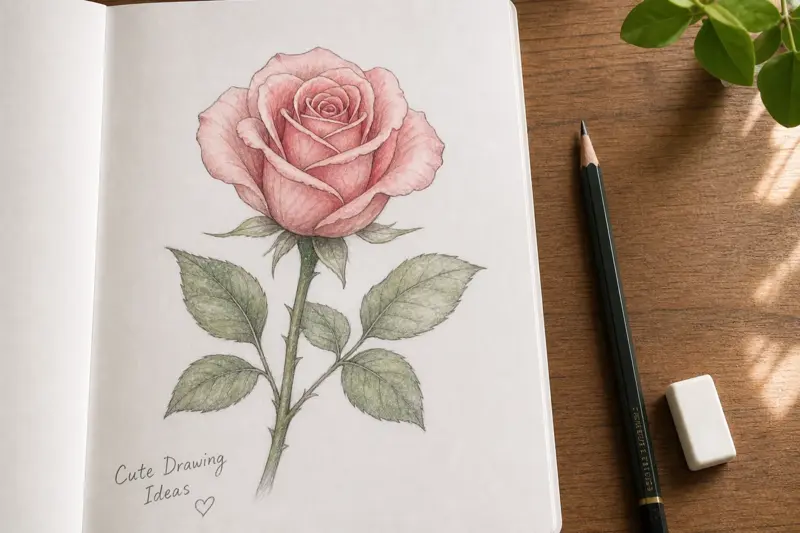
A rose looks complicated at first. The petals twist, overlap, and fold into each other. Many beginners think they need advanced art skills to draw one correctly. You do not need that. A good rose drawing starts with simple shapes. You build the flower layer by layer instead of trying to draw every petal at once. That approach makes the process easier and helps the rose look natural.
How to Build the Basic Rose Shape Step by Step
Many people make one mistake. They start by drawing random petals. That usually creates a flower that looks flat. Start with structure first.
Step 1: Draw a small center circle
Lightly draw a small circle in the middle of your page. Do not press hard. The circle acts as the center of the flower. It gives every petal a place to grow from. Do not worry about perfection. Real roses are not perfectly round.
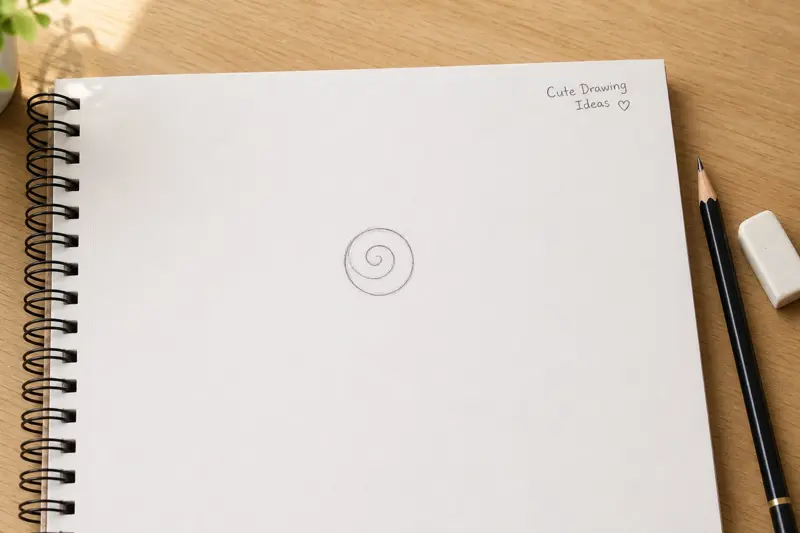
Step 2: Create the center spiral
Inside the circle, draw a curved spiral shape. Think about rolling a ribbon. The spiral should twist naturally toward the center. Do not create sharp corners. Petals curve smoothly. The spiral becomes the tightly folded petals in the middle of the rose.
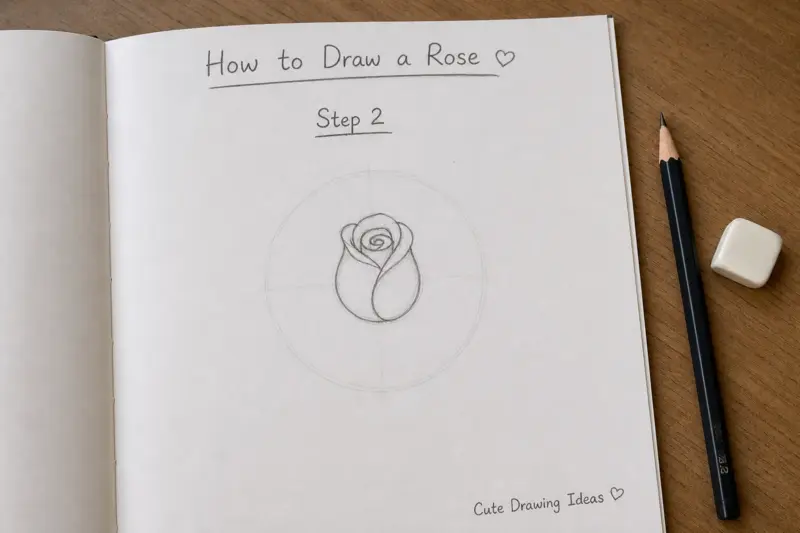
Step 3: Add the first layer of petals
Now begin drawing petals around the spiral. Draw each petal using curved lines.
Keep these petals:
- Small
- Tight
- Close together
Imagine wrapping paper around a gift. The petals hug the center. Avoid drawing identical shapes. Natural petals vary in size.
Step 4: Build outward
Move away from the center slowly. Draw larger petals as you move outward. Allow some petals to overlap. Some petals should hide behind others. Overlap creates depth. Without overlap, the flower looks flat. At this stage your rose should resemble a blooming flower.
Step 5: Check the balance
Pause before moving forward. Look at your flower.
Ask:
- Does one side have too many petals?
- Are large gaps visible?
- Does the flower look uneven?
Fix problems now using light sketch lines. This step saves time later.
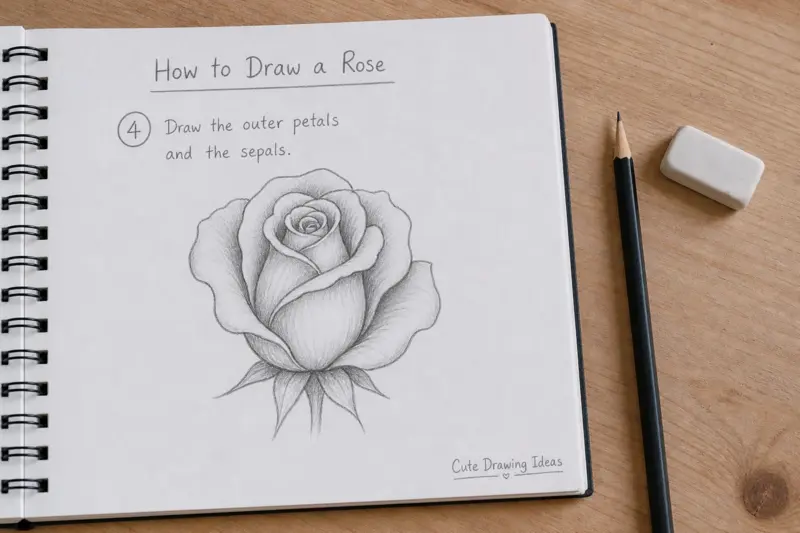
How to Draw Outer Petals, Sepals, Stem, and Leaves
Now your flower needs support structures. These details make the rose feel complete.
Drawing outer petals
Outer petals behave differently from inner petals. Inner petals stay tight. Outer petals open wider.
To draw them:
Start at the flower edge. Pull curved lines outward. Allow edges to bend slightly. Do not create perfect semicircles. Real petals twist and fold.
Try these changes:
- One petal slightly curled
- One petal folded inward
- One petal larger than others
Small imperfections create realism.
Draw the sepals
Sepals sit beneath the flower. They look like pointed leaves. Draw four or five thin shapes under the petals. Angle them downward. Keep them narrow. Do not make them larger than petals. Sepals frame the flower and create separation between the bloom and stem.
Draw the stem
Start from the flower base. Draw two slightly curved lines downward. Avoid perfectly straight lines. Plants rarely grow perfectly straight. Leave enough space between both lines. The space becomes the thickness of the stem.
Add thorns carefully
Not every rose needs thorns.
If you want them:
Draw small triangular shapes. Place them unevenly. Avoid lining them up perfectly. Real thorns grow naturally and randomly.
Draw leaves
Rose leaves usually grow in small groups. Draw an oval shape first.
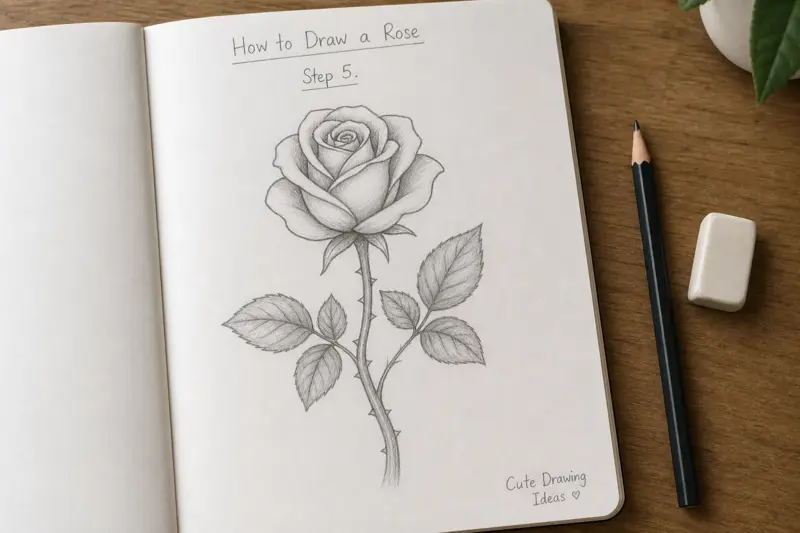
Next:
Add pointed edges. Draw a center vein. Add smaller veins branching outward. Keep leaf sizes different. Nature repeats patterns but rarely duplicates them exactly.
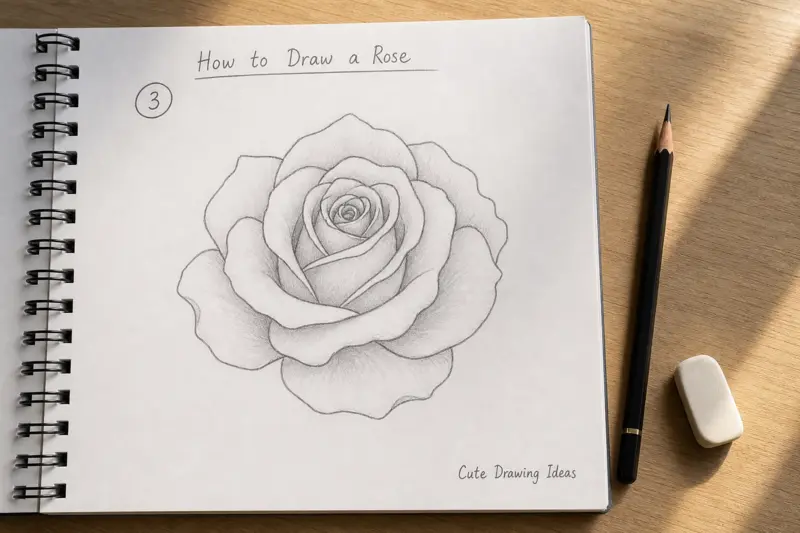
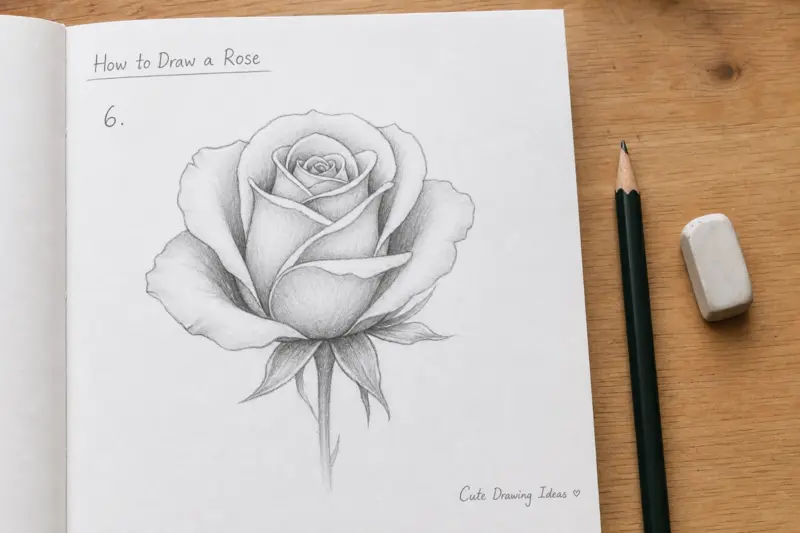
How to Shade a Rose and Make It Look Realistic
Shading separates basic sketches from realistic drawings. Many beginners shade incorrectly. They color everything evenly. That removes depth. Instead, think about light. Decide where light comes from.
For example:
Assume light comes from the upper left side.
That means:
- Left edges stay lighter
- Right areas become darker
- Hidden petals become darkest
Now begin shading.
Step 1: Add a light base layer
Take an HB pencil. Hold it sideways. Move it gently across the petals. Apply soft pressure. Do not create dark areas yet. You only want a light gray layer. This creates a foundation.
Step 2: Identify shadow areas
Look for places where petals overlap. These spots create natural shadows.
Darken:
- Petal bases
- Hidden folds
- Areas under overlapping petals
- Inner flower sections
Use a 2B pencil. Press lightly at first. You can always make shadows darker later.
Step 3: Blend the graphite
Take:
- Tissue
- Cotton swab
- Blending stump
Move in small circular motions. Do not rub aggressively. Aggressive blending creates muddy textures. You want smooth transitions.
Step 4: Deepen dark areas
Take a softer pencil like 6B.
Darken only the deepest areas:
- Flower center
- Tight petal folds
- Hidden shadows
Contrast creates realism. Without contrast the drawing looks flat.
Step 5: Create highlights
Take an eraser. Press lightly against brighter areas.

Lift graphite from:
- Petal edges
- Curved surfaces
- Light-facing sections
This creates reflected light. Suddenly the petals appear three-dimensional.
How to Turn a Simple Rose Into a Realistic Rose
Many tutorials stop after basic shading. That leaves the drawing looking unfinished. Here are methods that create realism.
Add petal texture
Rose petals are soft. They have slight surface changes.
Create texture by drawing:
- Tiny curved lines
- Soft edge variations
- Light wrinkles
Do not overdo it. Too many lines make petals look old.
Vary edge thickness
Not every outline should look dark. Heavy outlines flatten drawings.
Instead:
Darken shadow edges. Keep bright edges lighter. This trick adds dimension.
Use softer transitions
Hard transitions rarely appear in flowers. Petals fade gradually.
Blend between:
- Light and shadow
- Dark and medium tones
Smooth changes create softness.
Study reference photos
Look at real roses.
Observe:
- Fold direction
- Petal shape
- Shadow placement
- Leaf structure
Even five minutes of observation helps.
Stop Copying Petals and Start Understanding Petal Flow
Most tutorials say:
“Draw this petal here.”
Then:
“Draw another petal there.”
That works for copying. It does not help you draw roses from memory. Instead, learn petal flow. Think of a rose as layers wrapping around a center point. Imagine opening a rolled paper tube. The center stays tight. Outer layers spread wider. Every petal follows that movement. Practice this exercise:
Exercise One
Draw three circles.
Inside each circle:
- Draw only center petals
Stop. Repeat five times.
Exercise Two
Draw three new circles.
Add:
- Center petals
- Middle petals
Stop again.
Exercise Three
Draw complete roses. Focus only on petal direction. Ignore shading. After several attempts you will notice something important. You stop copying. You begin constructing. That skill transfers to every flower drawing.
Common Mistakes Beginners Make and How to Fix Them
Mistake 1: Petals look identical
Problem:
Every petal has the same size.
Fix:
Change width and shape slightly. Nature creates variation.
Mistake 2: Rose looks flat
Problem:
No overlapping petals.
Fix:
Allow petals to hide behind others.
Mistake 3: Dark outlines everywhere
Problem:
Heavy outlines remove realism.
Fix:
Keep outlines soft. Use shadows instead.
Mistake 4: Shading covers everything equally
Problem:
No contrast exists.
Fix:
Choose a light source. Create dark and light areas.
Mistake 5: Drawing starts too dark
Problem:
Mistakes become difficult to erase.
Fix:
Sketch lightly first. Darken later.
FAQ ( how to draw a rose )
How do you draw a rose step by step?
Start with a center circle. Draw a spiral inside it. Add small petals around the center. Build larger petals outward. Add stem, leaves, and shading.
How do beginners draw realistic roses?
Focus on simple shapes first. Build layers slowly. Use overlapping petals and soft shading.
What pencil works best for rose drawing?
HB pencils work well for sketching. Softer pencils like 2B and 6B create shadows.
How do you make petals look natural?
Vary shape and size. Avoid identical petals. Add soft curves and overlapping edges.
How long does it take to learn rose drawing?
Most beginners improve after several practice sessions. Repeating the same flower structure speeds progress.
Your Next Step
You do not need to master every detail today. Draw one rose using this guide. Then draw another without looking at it. Compare both versions. Notice which petals felt difficult. Notice where shading felt weak. Then repeat the process. Skill grows through repetition. Start with structure. Build the petals. Add depth with shadows. One page later, the rose becomes easier. Ten pages later, you begin drawing it naturally.