Eyes Drawing – Complete Beginner to Realistic Guide
🎨 Instant Eyes Drawing Prompt
Click the button to get a new eyes drawing idea for practice:

Eyes Drawing: The Complete Guide to Drawing Realistic and Expressive Eyes
The human eye holds emotion, focus, and personality. One small sketch can show joy, fear, or curiosity. That power makes eyes drawing one of the most important skills for artists. Many beginners feel nervous when drawing eyes. The shape looks simple, yet the details confuse them. The iris, eyelids, lashes, and light reflections all work together. Miss one detail and the drawing feels flat. I struggled with this early in my drawing journey. I copied many eyes from photos. Still, my sketches looked lifeless. Then I realized something important:
Most people draw the eye before understanding its structure.
The eye is not a flat almond shape. It sits on a round eyeball. Eyelids wrap around that sphere. Light touches the surface and creates reflections. Once I understood this, my drawings improved quickly. Artists from the Royal Academy of Arts stress observation before technique. They encourage students to study the form first. You will start with simple shapes. Then you will learn shading, texture, and light. Step by step, your drawings will grow stronger. When you finally draw the eye correctly, something magical happens. The portrait suddenly feels alive.
Why Learning Eyes Drawing Is Important for Artists
The eye sits at the emotional center of every portrait. Viewers look there first. One well-drawn eye can hold attention for minutes. Artists across history understood this truth. Painters like Leonardo da Vinci studied the eye closely. He believed careful observation revealed the soul of a subject. Small mistakes quickly break the illusion. A slightly misplaced iris looks strange. Uneven eyelids make the face feel stiff.
Learning eyes drawing strengthens several core skills:
Each sketch trains your ability to notice subtle shapes. Over time, you start seeing things others miss. My biggest realization came during a long sketch practice. I noticed something simple. The eye never sits flat on the face. It wraps around the eyeball like fabric over a ball. That small discovery changed my drawings completely. Suddenly, shading made sense. Eyelids felt natural. The eye gained depth and emotion. Once artists understand this structure, portraits begin to feel alive.
Understanding the Anatomy of the Human Eye (For Artists)
Artists draw better eyes when they understand how the eye actually works. The eye contains several small parts. Each part affects shape, shadow, and expression. Researchers at National Eye Institute explain that the eye forms a round structure. This round form creates natural depth and light changes.
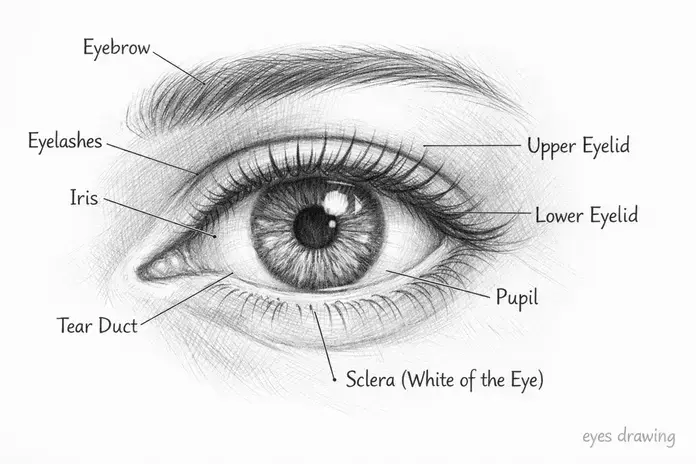
Eye Structure
Why Anatomy Improves Realism
Many beginners treat the eye as a flat symbol. Real eyes behave differently:
Practical Tip: Imagine a small sphere inside the eye. This helps place shadows correctly and create natural depth.
Tools and Materials for Eyes Drawing
The right tools make eyes drawing easier and more enjoyable. You do not need expensive supplies. Many great artists start with simple materials. Experts at The Metropolitan Museum of Art highlight how classic artists relied on basic pencils and paper. Skill grows from observation and practice, not fancy equipment.

Essential Drawing Tools
Digital Drawing Tools
Pro Tip: Beginners can start under $20 with an HB pencil, 2B pencil, kneaded eraser, and basic sketchbook.
Step-by-Step Eyes Drawing Guide (Beginner Friendly)
Breaking drawing into steps builds structure and depth. Each stage adds realism.
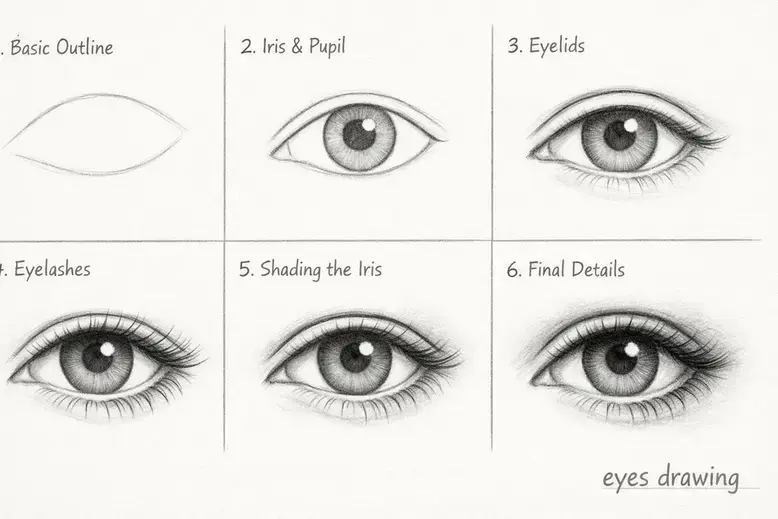
Step 1: Draw the Basic Eye Shape
Start with a soft almond shape. Keep lines light. Check proportion and spacing.
Step 2: Add the Iris and Pupil
Draw a circle for the iris, place the pupil at the center. This controls eye focus direction.
Step 3: Draw Eyelids
Step 4: Add Eyelashes
Step 5: Shade the Iris
Step 6: Add Highlights and Shadows
Result: The eye begins to feel three-dimensional and expressive.
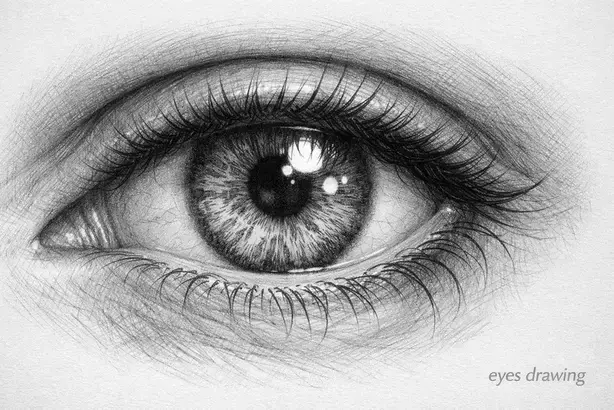
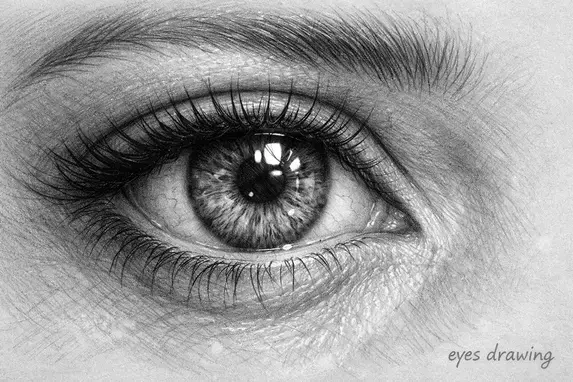
Realistic Eyes Drawing Techniques
Shading Techniques
Creating Iris Texture
Light and Reflection
Artist Insight: Small highlights can make an eye sparkle. They create emotional connection instantly.
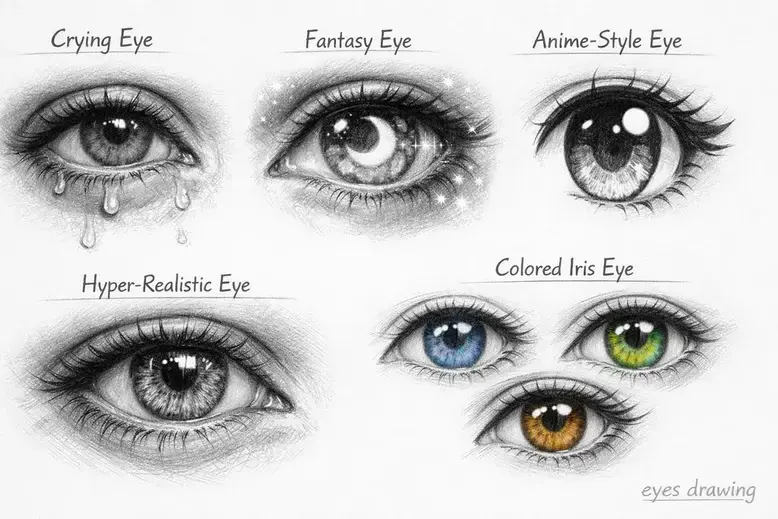
Different Eyes Drawing Styles
Benefits: Learning multiple styles improves observation, shading skills, and creative freedom.
How to Draw Female Eyes vs Male Eyes
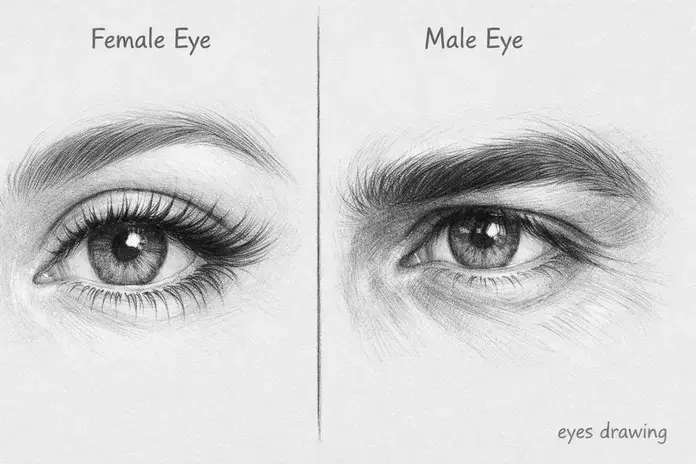
Female Eyes
Male Eyes
Visual Insight: Female eyes appear delicate and expressive; male eyes feel structured and intense. Small adjustments in eyelid or lash shape define gender naturally.
Common Eyes Drawing Mistakes Beginners Make
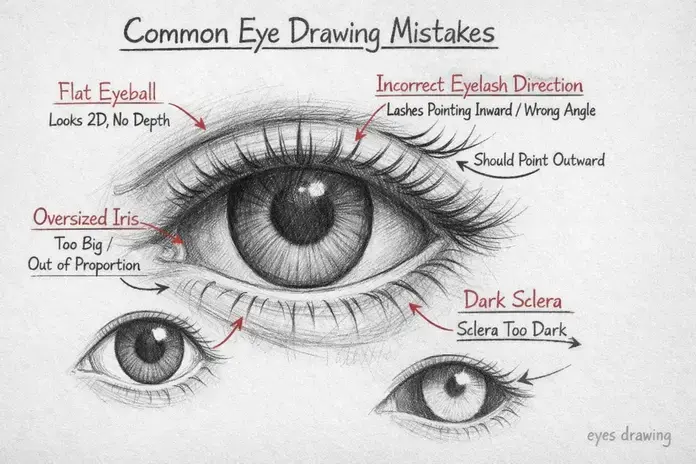
Frequent Mistakes
Quick Fix Tips
Personal Insight: Adjusting iris size and eyelid curves instantly improved my portraits.
Eye Shading Techniques That Create Realism
Psychological Insight: Humans notice contrast before details. Proper shading makes eyes feel alive instantly.
Practice Exercises to Improve Eyes Drawing Fast
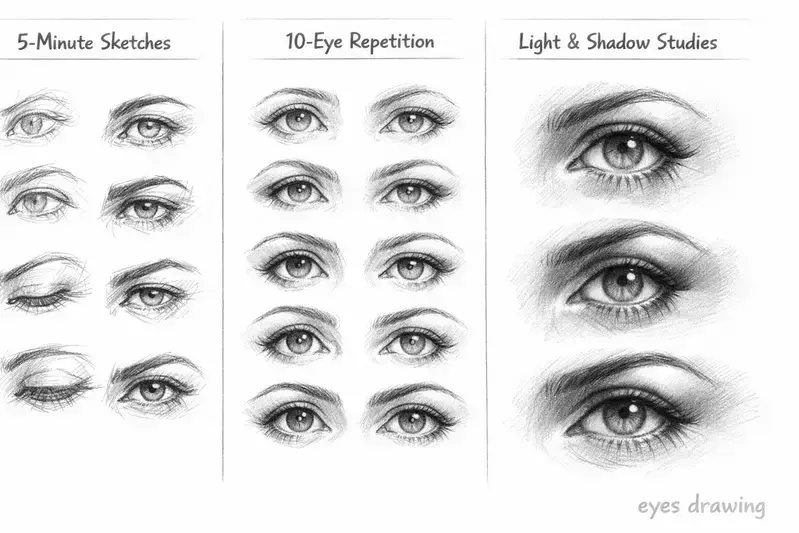
Motivational Insight: Every sketch teaches something new. Consistent practice builds skill faster than occasional long sessions.
Eyes Drawing Ideas for Artists
These ideas work for Pinterest, Instagram, and portfolios. Creativity enhances skill while keeping drawing fun.
Frequently Asked Questions About Eyes Drawing
How do beginners draw eyes?
Start with basic shapes. Add iris, pupil, and eyelids lightly.
How do you draw realistic eyes?
Focus on structure, gradual shading, iris texture, and highlight preservation.
Why are eyes hard to draw?
Complex curves, subtle shadows, and reflections make the eye challenging.
How long does it take to master eye drawing?
Improvement appears in weeks. Mastery can take months with daily practice.
What pencils are best for eye drawing?
Use 2B–8B graphite pencils. Softer pencils deepen shadows, harder pencils add fine details.
Final Thoughts: Mastering Eyes Drawing Takes Observation
Drawing eyes is observation more than talent. Careful study beats copying blindly. Subtle improvements appear with each sketch. Every mistake teaches insight. Patience is key. Every artist struggles at first. Watching light, iris patterns, and lash growth makes drawings alive. With steady observation and practice, your eyes will look expressive, realistic, and full of life. Each sketch is a step toward mastery.
Remember: the eye is not just a feature—it carries emotion, story, and personality in one glance.