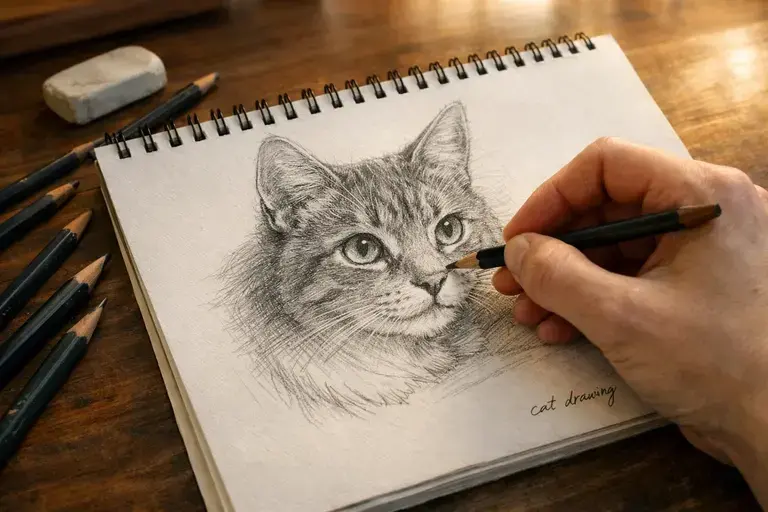
Cat Drawing: The Complete Beginner-to-Advanced Guide (Step-by-Step + Styles + Pro Tips)
Drawing a cat sounds simple at first. Two ears, a tail, some whiskers. But most beginners find that the result does not match what they pictured. The face looks off. The body feels stiff. The eyes seem empty. This happens because cats have specific proportions that are easy to get wrong. If the ears sit too high, the cat looks startled. If the eyes are too far apart, the face loses its structure. These are not talent problems — they are proportion problems, and proportion can be learned.
This guide covers the full process. You will learn how to place features correctly, how to build the body with basic shapes, and how to add fur and shading with purpose. It covers simple beginner sketches, cute cartoon styles, and realistic portraits. Every section focuses on what actually causes problems and how to fix it.
What Is Cat Drawing
Cat drawing means creating a visual image of a cat using lines, shapes, and shading. Artists also call it a cat sketch, cat illustration, or feline art. The goal stays simple. You want your drawing to look and feel like a cat. That means correct shape, strong expression, and natural movement. A cat drawing can be very simple. It can also be highly detailed. Some people draw a quick doodle with two circles and triangle ears. Others create realistic portraits that show every strand of fur. Both count. Both matter. The style depends on your goal.
Starting with simple doodles — round heads and tiny bodies — builds proportion awareness before adding complexity. Studying real cat anatomy later, particularly how the spine curves and how the eyes tilt slightly upward, is what makes drawings start to look convincing.Traditional cat drawing uses paper and physical tools.
You might use graphite pencils, charcoal, or ink. Your hand pressure controls the depth of each line. You feel the texture of paper. Many artists love that direct connection. Digital cat drawing uses a tablet and stylus. You draw on a screen. You use layers and undo mistakes quickly. Both methods work well. Choose the one that fits your style.
Cats rank among the most drawn animals in art history. Ancient cultures respected them. Artists painted them on walls and pottery. During the Renaissance, painters studied animal anatomy closely. Today, cats dominate sketchbooks and social media feeds. Their expressive eyes and flexible bodies make them perfect subjects. They show emotion clearly. They sit still for moments. Then they leap with grace. That contrast inspires artists.
Mini FAQ
What is the easiest way to draw a cat?
Start with basic shapes. Draw a circle for the head and an oval for the body. Add triangle ears. Refine slowly.
Is cat drawing good for beginners?
Yes. Cats teach proportion, curves, and expression. They challenge you just enough to grow your skill.
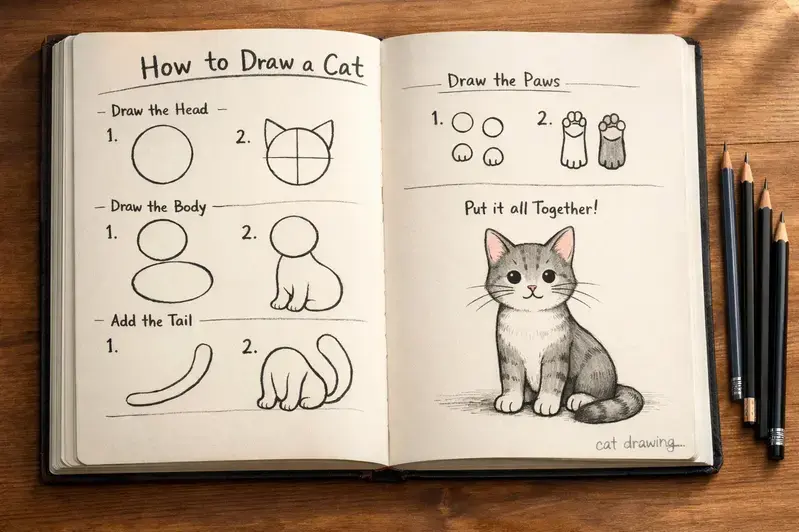
How to Draw a Cat (Step-by-Step for Beginners)
Let’s draw your first solid cat. Do not overthink it. Follow these steps slowly. Focus on structure first. Details come later. Structure comes first. Adding fur and eye detail before the base proportions are correct is the most common reason beginner cat drawings fall apart. Strong structure builds strong art.
Step 1 – Start With Simple Shapes
Draw a clean circle for the head. Keep your lines light. Do not press hard. Add a large oval under the head for the body. Slightly tilt the oval for a natural pose. Now place two small triangles on top of the circle. These form the ears. Keep space between them. Many beginners push the ears too wide. That small mistake changes the whole face. At this stage, your drawing should look simple and soft. That is good. Simple shapes create control. Control builds confidence.

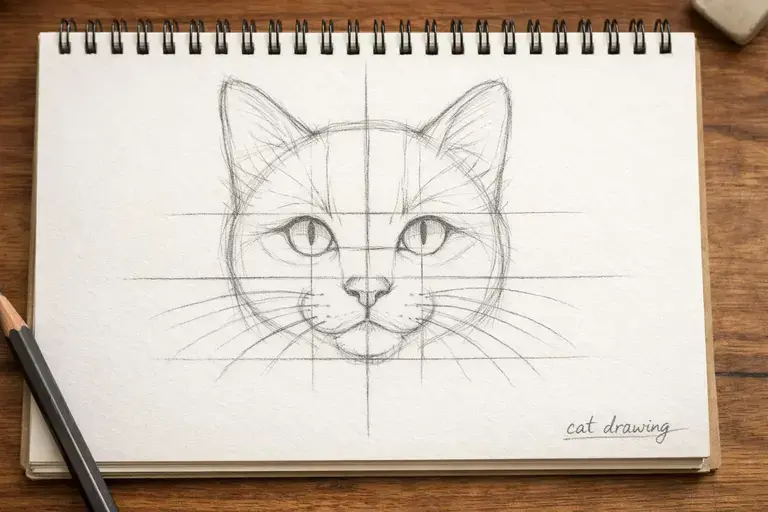
Step 2 – Define the Face
Draw a light vertical line down the face. Add a horizontal guide across the middle. Place the eyes slightly below the center line. Cats have lower eye placement than humans. Keep space equal between the eyes. Add small curved shapes under the center for whisker pads. Place a tiny triangle nose above them. Do not make the nose too large. Beginners often exaggerate it. Small adjustments here create a big difference.
Step 3 – Body and Tail Structure
Refine the oval into a soft body shape. Add gentle curves for the back and chest. Sketch simple cylinders for legs. Keep them balanced. Many beginners draw legs too thin. Cats need stable support. Attach a tail that flows from the lower back. Let it curve naturally. Avoid stiff straight lines. Think of the tail as a relaxed rope.
Step 4 – Add Fur and Details
Now add fur with short strokes. Follow the direction of growth. Fur near the face moves outward. Fur on the body flows downward. Do not scribble randomly. Direction gives realism. Keep strokes light and layered. Less feels more natural.
Step 5 – Shading and Depth
Choose one light source. Imagine light hitting from one side. Shade the opposite side gently. Darken under the chin and belly. Blend softly with controlled strokes. Do not over-blend. Too much blending kills texture. Keep some pencil marks visible. They add life.
Beginner Confidence Boost
You will make mistakes. Eyes may sit unevenly. Ears may tilt wrong. That is normal. Your first ten cats will not look perfect. Progress hides inside repetition. Each drawing teaches your hand something new. Stop judging early attempts. Treat them as training, not failure. Keep drawing. Each cat will look better than the last.
10 Easy Cat Drawing Ideas You Can Try Today
Practice builds skill. Repetition builds confidence. Drawing small variations instead of chasing one perfect result is a more effective way to build skill. Each variation isolates a different challenge. These ideas keep things fun and stress free. Try one today. Try all this week.
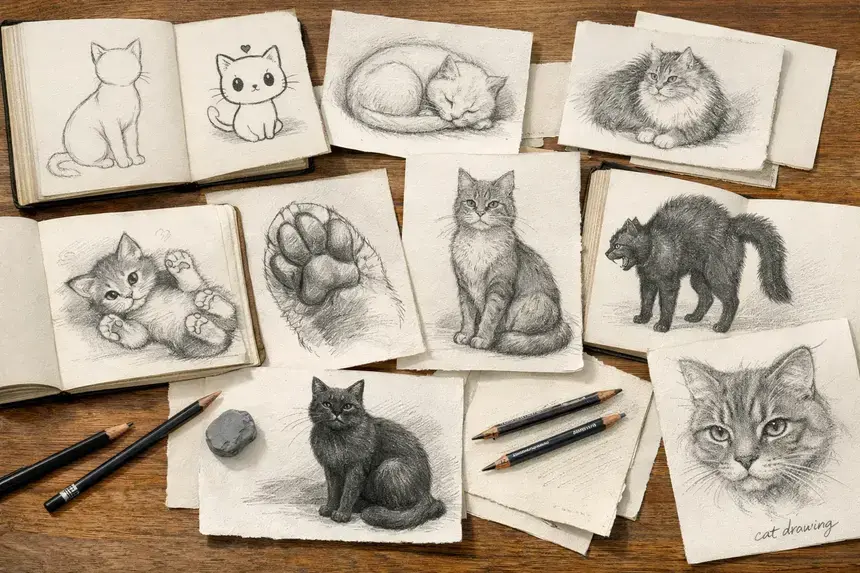
1. Simple Cat Outline
Draw a clean outer shape only. No shading. No heavy detail. Focus on smooth curves. This trains line control. Strong outlines create strong foundations.
2. Cute Cat Drawing
Make the head slightly larger than the body. Enlarge the eyes. Keep the mouth tiny. Cute style depends on soft proportions. It feels playful and friendly.
3. Sleeping Cat Drawing
Draw a curled body shape. Close the eyes with soft curved lines. Tuck the tail around the body. This pose teaches flow and balance.
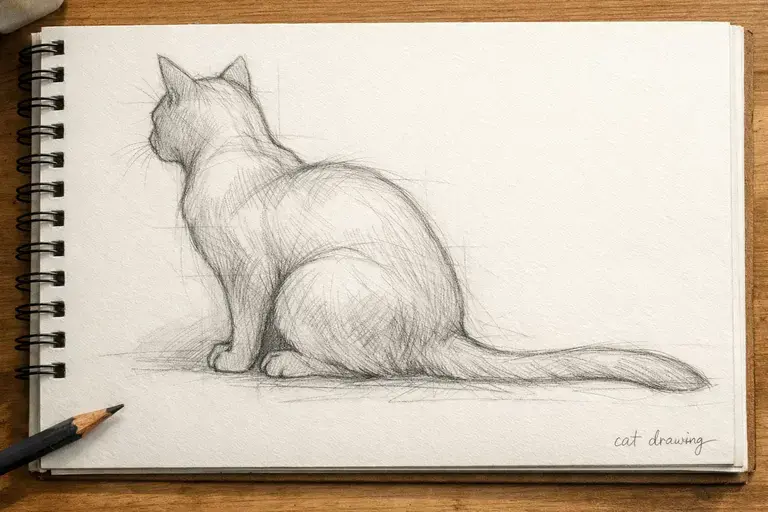
4. Sitting Cat Drawing
Sketch a straight back with front paws placed together. Keep the chest proud. This pose improves posture and proportion skills.
5. Cat Face Drawing
Focus only on the head. Study eye placement and ear spacing. Add whiskers carefully. This improves facial symmetry and expression.
6. Kitten Drawing
Make the body small and round. Shorten the legs. Enlarge the eyes slightly. Kittens look soft and curious. Their proportions feel different from adult cats.
7. Black Cat Drawing
Use stronger shading. Define edges with highlights. Avoid flat darkness. Add subtle light around the eyes. This builds shading confidence.
8. Fluffy Cat Drawing
Use short layered strokes around the body. Add extra fur around the neck and tail. Direction matters here. Texture creates realism.
9. Cat Paw Drawing
Draw an oval base. Add four small toe shapes. Include tiny claw hints. This strengthens detail control and anatomy awareness.
10. Angry Cat Drawing
Lower the eyebrows. Narrow the eyes. Slightly open the mouth. Tilt the ears back. Expression changes everything. Emotion gives life to your art.
These small variations train different skills. You practice structure, texture, and emotion. More important, you stay engaged. Pick one idea now. Keep your pencil moving.
Popular Cat Drawing Styles
Style shapes your voice as an artist. The same cat can look playful, dramatic, soft, or bold. Each style teaches a different skill and develops
a different aspect of drawing control. Try them slowly. Notice what feels natural.
Cute Cat Drawing
Cute cat drawing suits beginners and hobby artists. Kids also love this style. You only need a pencil and paper. Colored pencils help add charm. Difficulty stays low to medium. Make the head slightly bigger than the body. Keep eyes round and expressive. Use soft curves instead of sharp lines. Focus on warmth and friendliness.
Kawaii Cat Drawing
Kawaii cat drawing fits artists who enjoy simple, adorable designs. This style works well for stickers and planners. Use fine liners or digital tools. Difficulty remains beginner friendly. Keep features tiny and centered. Add blush marks on the cheeks. Leave space around the character. Simplicity creates the magic.
Cartoon Cat Drawing
Cartoon cat drawing suits creative storytellers. Comic lovers enjoy this style. Use markers or digital brushes for bold lines. Difficulty ranges from beginner to intermediate. Exaggerate expressions strongly. Stretch the body for action poses. Push emotion further than reality.
Anime Cat Drawing
Anime cat drawing fits fans of Japanese animation. Teens and young artists love it. Use pencils first, then ink or digital layers. Difficulty feels moderate. Focus on large detailed eyes. Add sharp highlights. Keep the chin small and delicate. Expression drives this style.
Chibi Cat Drawing
Chibi cat drawing works for playful character art. It suits beginners exploring proportions. Use simple tools or tablets. Difficulty stays low. Make the body tiny. Keep the head large and rounded. Short limbs create charm.
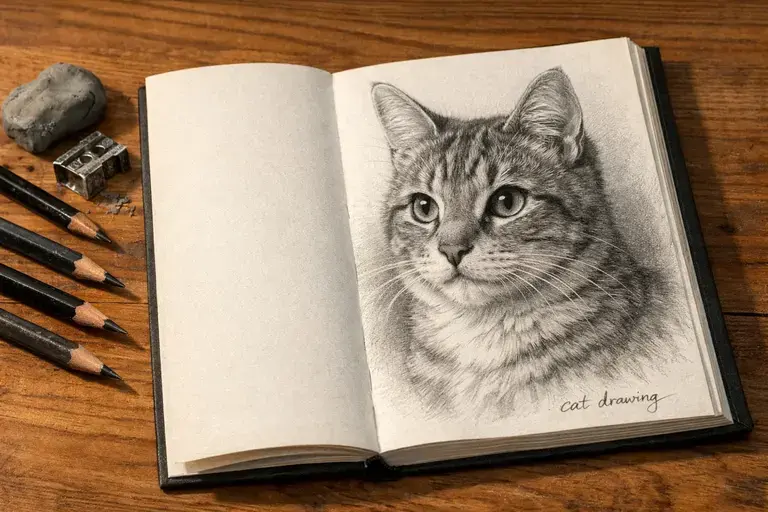
Realistic Cat Drawing
Realistic cat drawing fits advanced learners. You need graphite pencils or charcoal. A blending stump helps with shading. Difficulty feels high. Study anatomy carefully. Observe fur direction. Build layers slowly. Patience defines success here.
Minimalist Cat Drawing
Minimalist cat drawing suits modern art lovers. Designers enjoy this style. Use a fine liner or digital pen tool. Difficulty stays moderate. Use few lines. Each line must count. Focus on clean shapes and balance.
Line Art Cat Drawing
Line art cat drawing fits artists who love clarity. Use black ink pens or digital brushes. Difficulty ranges from beginner to advanced. Control line weight carefully. Thicker lines show shadow. Thin lines show light areas.
Watercolor Cat Drawing
Watercolor cat drawing suits artists who enjoy soft textures. Use watercolor paper and brushes. Difficulty feels intermediate. Start with light washes. Build color slowly. Let water create natural blends.
Digital Cat Drawing
Digital cat drawing fits modern creators. Use a drawing tablet and stylus. Apps like Procreate or Photoshop work well. Difficulty depends on skill level. Use layers wisely. Adjust opacity for smooth shading. Practice brush control daily.
Each style teaches something new. Explore them with curiosity. You will discover the one that feels like home.
How to Draw a Realistic Cat
Realistic cat drawing challenges your observation skills. It teaches patience, anatomy, and attention to detail. Sketching real cats in motion, rather than working only from photos, reveals subtle curves and weight shifts that static images miss. Start with anatomy basics. Sketch the spine as a soft S-curve. Note shoulder and hip placement. Legs follow simple cylinders. Paws are small ovals. Observe how the head connects smoothly to the neck. Understanding these proportions ensures your cat looks balanced.
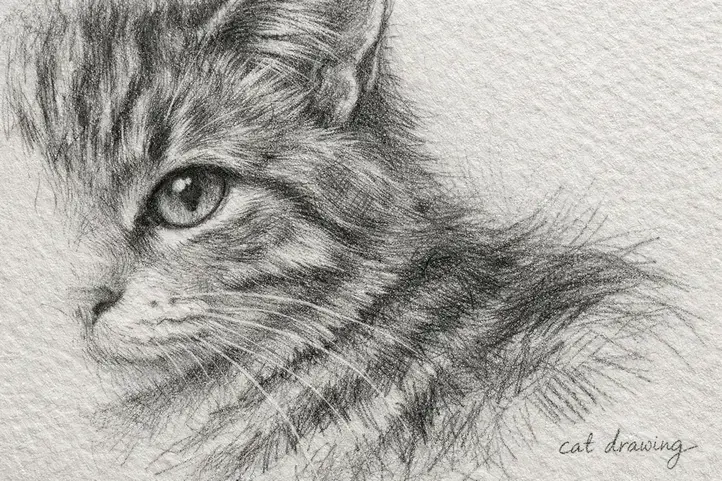
Next, focus on feline proportions. Eyes are wide-set and slightly tilted. Ears sit higher than human ears, angled outward. Whisker pads are round and slightly raised. Tail length matches body length in most cats. Beginners often misjudge these ratios. Accurate proportions create realism instantly. Fur layering comes next. Use short, controlled strokes. Follow the natural growth direction. Around the face, strokes radiate outward. On the body, they flow downwards. Layer light and dark tones gradually. Avoid heavy lines. Texture gives life and depth to your cat.
Eye detailing transforms your drawing. Add round pupils and subtle reflections. Note the iris patterns. Small lines around the eyes hint at fur. Eyes communicate personality. Eye detail takes more time than most other areas. A flat or empty eye undermines even well proportioned fur and body structure. Shading and cross-hatching enhance volume.
Choose a consistent light source. Shade gradually. Use cross-hatching to suggest muscle and depth. Soft blending helps with smooth areas like the belly. Hard edges emphasize fur clumps or facial structures. Keep strokes visible to maintain texture. Use reference photos to capture unusual poses or rare fur patterns. Study multiple images to understand lighting and anatomy. Compare photos with your sketches. Correct small mistakes early. References prevent guesswork.
Expert Tips: Observe live cats daily. Practice drawing the same pose repeatedly. For structured anatomy lessons, Proko offers free
video tutorials on animal form and proportions. Experiment with different pencils for texture. Step back frequently to spot proportion errors. Realistic art demands patience and observation.
What separates amateur from advanced cat art?
Advanced art shows anatomy mastery, subtle shading, precise fur direction, and expressive eyes. Amateurs often skip layering or misplace features. The difference lies in careful observation, deliberate strokes, and emotional depth. Realistic cats feel alive because the artist sees them clearly.
Best Tools for Cat Drawing
Choosing the right tools shapes your drawing experience. Tools do not determine skill, but the right basic set makes early practice more straightforward and less frustrating.

Traditional Tools
Graphite pencils from 2H to 6B for shapes and depth. Charcoal for bold strokes. Colored pencils for soft or vibrant fur. Fine liner pens for clean outlines. Sketchbooks for practice. Blending stumps for smooth shading.
Digital Tools
Drawing tablet and stylus pen for flexibility. Procreate for intuitive brushes and layers. Adobe Photoshop for detailed work. Clip Studio Paint for line art and anime-style cats.
Beginner Setup Recommendation
Start simple: sketchbook, HB and 2B pencils, fine liner, eraser. Practice shapes, faces, and textures first. Add color, blending tools, or digital tablets later.
Budget-Friendly Starter Kit
Affordable sketchbook, graphite pencils, fine liner, and eraser cover most beginner needs. Tools matter, but practice and observation matter more.
Cat Drawing for Different Audiences
Cat drawing can fit every age and skill level. Kids, beginners, hobbyists, and advanced artists all benefit when guidance matches their needs.
Cat Drawing for Kids
Use simple shapes: circles, ovals, triangles. Printable outlines let them trace or color confidently. Coloring pages teach coordination and creativity.

Cat Drawing for Preschoolers
Use a 5-step drawing approach. Big, bold shapes help small hands succeed. Focus on fun and recognition. Celebrate every attempt.
Cat Drawing for Adults
Drawing cats encourages relaxation and mindfulness. Simple sketches calm the mind. Coloring or light shading improves focus. Practice becomes meditative.
Realistic Cat Drawing for Advanced Artists
Focus on texture, light, and composition. Layer fur carefully. Control light and shadow. Accurate proportions make poses believable. Subtle observation separates skilled artists from beginners.
Cat Drawing References and Printables
References and printables speed learning and boost confidence.
Reference Photos: Study cats in different positions. Notice curves, tilt, and fur patterns. Compare multiple images for proportion and anatomy.
Outline Printables: Simple black-and-white outlines allow tracing or coloring. Focus on structure without overwhelming details.
Drawing Templates: Step-by-step frameworks break poses into head, body, ears, tail, and paws. Templates train observation and muscle memory.
Coloring Pages: Add patterns or imaginary fur colors. Coloring encourages experimentation. Kids and adults benefit from playful practice.
Using references keeps you engaged. Each sketch reinforces skills and builds confidence. The more time you spend observing and practicing, the more natural your drawings become.
7 Common Cat Drawing Mistakes (And How to Fix Them)
Even experienced artists make mistakes. Even experienced artists make mistakes. Recognizing them early improves results.
1. Eyes Too High: Use a horizontal guideline. Step back and check symmetry.
2. Body Too Stiff: Sketch soft S-curves. Observe real cats. Relax your hand.
3. Ignoring Perspective: Use light construction lines. Practice foreshortening.
4. Over-Blending: Keep pencil strokes visible. Layer lightly for texture.
5. Flat Shading: Shade gradually from light to dark. Observe light direction.
6. No Light Source: Decide light direction before shading. Highlights and shadows add depth.
7. Wrong Ear Placement: Place ears slightly above the center line. Angle according to head tilt.
Mistakes are normal. Fixing them transforms sketches from awkward to confident.
What Actually Improves Cat Drawing Over Time
Studying real cats closely makes the biggest difference. Watching how a cat moves, tilts its head, or curls its tail provides information that tutorials cannot fully capture. Small observations — a paw curl, a tail flick, the angle of ears during different moods — make sketches feel specific rather than generic. Drawing from memory produces stiff, unnatural results.
Reference guides proportions and poses without limiting creativity. Using reference is not a shortcut — it is standard practice at every skill level. Chasing perfection on a single drawing slows progress more than anything else. Completing more drawings, even imperfect ones, builds the hand-eye coordination and proportion sense that deliberate correction cannot replace. Each finished sketch — regardless of quality — contributes to the next one.
🐾 Printable Cat Drawing Planner
Create your weekly cat drawing practice plan. Click generate, then print.
Frequently Asked Questions About Cat Drawing
How do you draw a cat step by step?
Start with simple shapes: circle for head, oval for body, triangle ears. Refine features gradually.
What is the easiest cat drawing?
Use a simple outline with minimal details. Focus on smooth curves and recognizable shapes.
How do you draw realistic cat fur?
Layer short strokes following natural fur direction. Use light and dark tones for depth.
What pencils are best for cat drawing?
Range from 2H to 6B. Light pencils for shapes, dark pencils for shading and details.
How long does it take to learn cat drawing?
Consistent practice over weeks or months builds solid skills. Small daily sketches work best.
Can kids learn to draw cats easily?
Yes. Start with big shapes and simple outlines. Encourage coloring and fun first.
What app is best for digital cat drawing?
Procreate, Adobe Photoshop, and Clip Studio Paint. Use tablets with stylus pens.
Explore More Cat Drawing Guides
This hub lets you explore styles, techniques, and tools. Each guide builds skill and inspires creativity.